Lời mở đầu
Chào mừng các bạn quay trở lại!
Hãy tưởng tượng sếp giao cho bạn task: “Em hãy kiểm tra tính năng Đăng ký với 50 bộ dữ liệu người dùng khác nhau để đảm bảo hệ thống ổn định”. Nếu bạn viết 50 cái @Test, file code của bạn sẽ dài như “sớ Táo Quân” và cực kỳ khó sửa đổi.
Data Driven Testing (DDT) là phương pháp tách dữ liệu (Input data, Expected results) ra khỏi script kiểm thử. Dữ liệu sẽ được lưu ở file ngoài (Excel, CSV, JSON, Database…), và code chỉ viết 1 lần nhưng chạy n lần.
Hôm nay, chúng ta sẽ chinh phục 2 định dạng phổ biến nhất:
- Excel (.xlsx): Chuẩn mực truyền thống, dễ sửa cho Tester/BA.
- JSON (.json): Chuẩn mực hiện đại, nhanh, nhẹ, dễ tích hợp CI/CD.
Chuẩn bị môi trường & Thư viện
Để đọc được Excel và JSON trong Java, chúng ta cần thêm các thư viện vào file pom.xml trong Eclipse.
1. Thêm Dependency
Mở file pom.xml và thêm các đoạn sau:
<dependencies>
    <dependency>
        <groupId>org.apache.poi</groupId>
        <artifactId>poi-ooxml</artifactId>
        <version>5.2.3</version>
    </dependency>

    <dependency>
        <groupId>com.fasterxml.jackson.core</groupId>
        <artifactId>jackson-databind</artifactId>
        <version>2.15.2</version>
    </dependency>
</dependencies>Lưu ý: Sau khi save file
pom.xml, nhớ chuột phải vào project chọn Maven > Update Project để tải thư viện về nhé.
Phần 1: Đọc dữ liệu từ Excel (Apache POI)
Excel là định dạng “phổ biến”. Để đọc nó, ta dùng thư viện Apache POI.
Cấu trúc file Excel
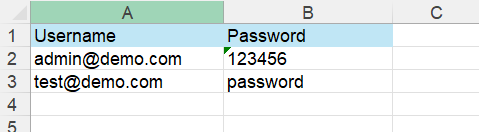
Hãy tạo một file LoginData.xlsx và đặt trong thư mục src/test/resources (nếu chưa có thư mục này, hãy chuột phải vào src/test > New Folder).
Nội dung file Excel (Sheet1):
Viết hàm đọc Excel (ExcelUtils.java)
Tạo class ExcelUtils trong package com.automation.utils.
package com.automation.utils;

import org.apache.poi.ss.usermodel.*;
import org.apache.poi.xssf.usermodel.XSSFWorkbook;
import java.io.FileInputStream;
import java.io.IOException;

public class ExcelUtils {

    public static Object[][] getExcelData(String filePath, String sheetName) throws IOException {
        FileInputStream fis = new FileInputStream(filePath);
        Workbook workbook = new XSSFWorkbook(fis);
        Sheet sheet = workbook.getSheet(sheetName);

        int rowCount = sheet.getLastRowNum(); // Số dòng (trừ header)
        int colCount = sheet.getRow(0).getLastCellNum(); // Số cột

        Object[][] data = new Object[rowCount][colCount];

        // Duyệt từ dòng thứ 2 (index 1) vì dòng 0 là Header
        for (int i = 1; i <= rowCount; i++) {
            Row row = sheet.getRow(i);
            for (int j = 0; j < colCount; j++) {
                Cell cell = row.getCell(j);
                DataFormatter formatter = new DataFormatter();
                data[i - 1][j] = formatter.formatCellValue(cell); // Ép kiểu về String hết
            }
        }
        workbook.close();
        return data;
    }
}Giải thích: Hàm này trả về mảng 2 chiều
Object[][]– đây chính là định dạng mà TestNG DataProvider yêu cầu.
Phần 2: Đọc dữ liệu từ JSON (Jackson)
JSON (JavaScript Object Notation) nhẹ hơn và map trực tiếp với Object trong Java (POJO).
Cấu trúc file JSON
Tạo file users.json trong src/test/resources:
[
  {
    "email": "json_user1@test.com",
    "password": "123"
  },
  {
    "email": "json_user2@test.com",
    "password": "456"
  }
]Tạo POJO Class (User.java)
Tạo class đại diện cho dữ liệu:
public class UserData {
    private String email;
    private String password;

    // Bắt buộc phải có Getter/Setter và Constructor rỗng
    public UserData() {}

    public String getEmail() { return email; }
    public void setEmail(String email) { this.email = email; }

    public String getPassword() { return password; }
    public void setPassword(String password) { this.password = password; }
}Viết hàm đọc JSON
package com.automation.utils;

import com.fasterxml.jackson.core.type.TypeReference;
import com.fasterxml.jackson.databind.ObjectMapper;
import java.io.File;
import java.io.IOException;
import java.util.List;

public class JsonUtils {
    public static List<UserData> getJsonData(String filePath) throws IOException {
        ObjectMapper mapper = new ObjectMapper();
        return mapper.readValue(new File(filePath), new TypeReference<List<UserData>>(){});
    }
}Kết hợp với TestNG DataProvider
Bây giờ là lúc “ghép nối” dữ liệu vào Test Case. Chúng ta sẽ dùng Annotation @DataProvider của TestNG.
Lab thực hành: Login nhiều tài khoản
Trang test: https://automationexercise.com/login
Code TestNG (LoginDDTTest.java):
package com.automation.tests;

import com.automation.utils.ExcelUtils;
import org.openqa.selenium.By;
import org.openqa.selenium.WebDriver;
import org.openqa.selenium.chrome.ChromeDriver;
import org.testng.Assert;
import org.testng.annotations.*;
import java.io.IOException;
import java.time.Duration;

public class LoginDDTTest {
    WebDriver driver;

    @BeforeMethod
    public void setup() {
        driver = new ChromeDriver();
        driver.manage().window().maximize();
        driver.manage().timeouts().implicitlyWait(Duration.ofSeconds(10));
        driver.get("https://automationexercise.com/login");
    }

    // 1. Khai báo DataProvider lấy dữ liệu từ ExcelUtils
    @DataProvider(name = "excelData")
    public Object[][] getData() throws IOException {
        String path = "src/test/resources/LoginData.xlsx";
        return ExcelUtils.getExcelData(path, "Sheet1");
    }

    // 2. Map dữ liệu vào @Test
    @Test(dataProvider = "excelData")
    public void testLogin(String username, String password) {
        System.out.println("Testing with: " + username + " / " + password);

        driver.findElement(By.cssSelector("input[data-qa='login-email']")).sendKeys(username);
        driver.findElement(By.cssSelector("input[data-qa='login-password']")).sendKeys(password);
        driver.findElement(By.cssSelector("button[data-qa='login-button']")).click();

        // Giả sử test case negative (đăng nhập sai) -> Cần verify lỗi
        boolean isErrorDisplayed = driver.findElement(By.xpath("//p[contains(text(),'incorrect')]")).isDisplayed();
        Assert.assertTrue(isErrorDisplayed, "Lỗi không hiển thị!");
    }

    @AfterMethod
    public void tearDown() {
        driver.quit();
    }
}Góc tương tác: Khi bạn chạy file này, hãy nhìn vào tab “Result of running suite” trong Eclipse. Bạn sẽ thấy Test Case chạy lặp lại tương ứng với số dòng trong file Excel. Thật kỳ diệu phải không?
Mini Project cuối buổi
Để thành thạo DDT, hãy tự tay làm project sau.
Đề bài: Tìm kiếm sản phẩm hàng loạt trên https://demo.nopcommerce.com/
Yêu cầu:
- File JSON: Chứa danh sách 5 từ khóa sản phẩm (ví dụ: “Apple”, “Nike”, “HTC”, “Book”, “Laptop”).
- Logic Test:
- Đọc JSON.
- Nhập từ khóa vào ô Search.
- Kiểm tra (Assert) xem có ít nhất 1 sản phẩm trả về không.
- Báo cáo: Ghi log ra màn hình console kết quả tìm kiếm của từng từ khóa.
Gợi ý: Với JSON, bạn cần chuyển List<UserData> sang Object[][] bên trong @DataProvider để TestNG hiểu được.
@DataProvider(name = "jsonData")
public Object[][] getJsonData() throws IOException {
    List<ProductData> list = JsonUtils.getJsonData("src/test/resources/products.json");
    Object[][] data = new Object[list.size()][1];
    for(int i=0; i<list.size(); i++) {
        data[i][0] = list.get(i);
    }
    return data;
}Tổng kết và bài tập về nhà
Data Driven Testing là kỹ năng bắt buộc phải có của một Automation Tester chuyên nghiệp. Nó giúp test coverage (độ bao phủ) rộng hơn mà không làm phình code.
Tóm tắt kiến thức:
- Apache POI: Dùng để đọc file Excel (
.xlsx). - Jackson: Dùng để đọc file JSON và map vào Java Object.
- @DataProvider: Cầu nối đưa dữ liệu từ file vào hàm
@Test.
Câu hỏi củng cố:
- Tại sao dùng
DataFormattertrong Apache POI lại an toàn hơn dùngcell.getStringCellValue()? - Ưu điểm của JSON so với Excel trong automation là gì?
Bài tập về nhà: Hãy thử thách bản thân bằng cách kết hợp Page Object Model (bài trước) với Data Driven Testing (bài này). Hãy tạo trang Login theo mô hình POM và truyền dữ liệu từ Excel vào.
Chủ đề tiếp theo: Test chạy xong rồi, kết quả xem ở đâu cho đẹp? Bài tới chúng ta sẽ học về “Reporting đỉnh cao với Extent Reports“. Đừng bỏ lỡ nhé, báo cáo đẹp là cách tốt nhất để “lấy điểm” với sếp đấy!
Chúc các bạn thực hành thành công!